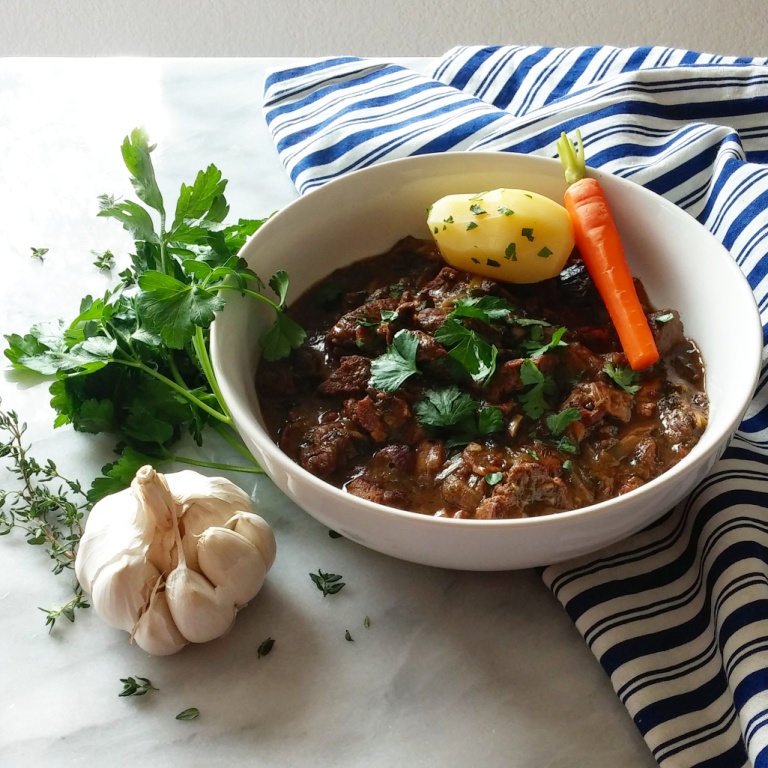
Gourmet Pot Roast
Copyright by Jacqueline Peppard, all rights reserved.
Join my other health conscious subscribers and receive exclusive recipes, private Q&A’s, giveaways, blog post notices, and more! Sign up here. Thanks!
Serves 6-8
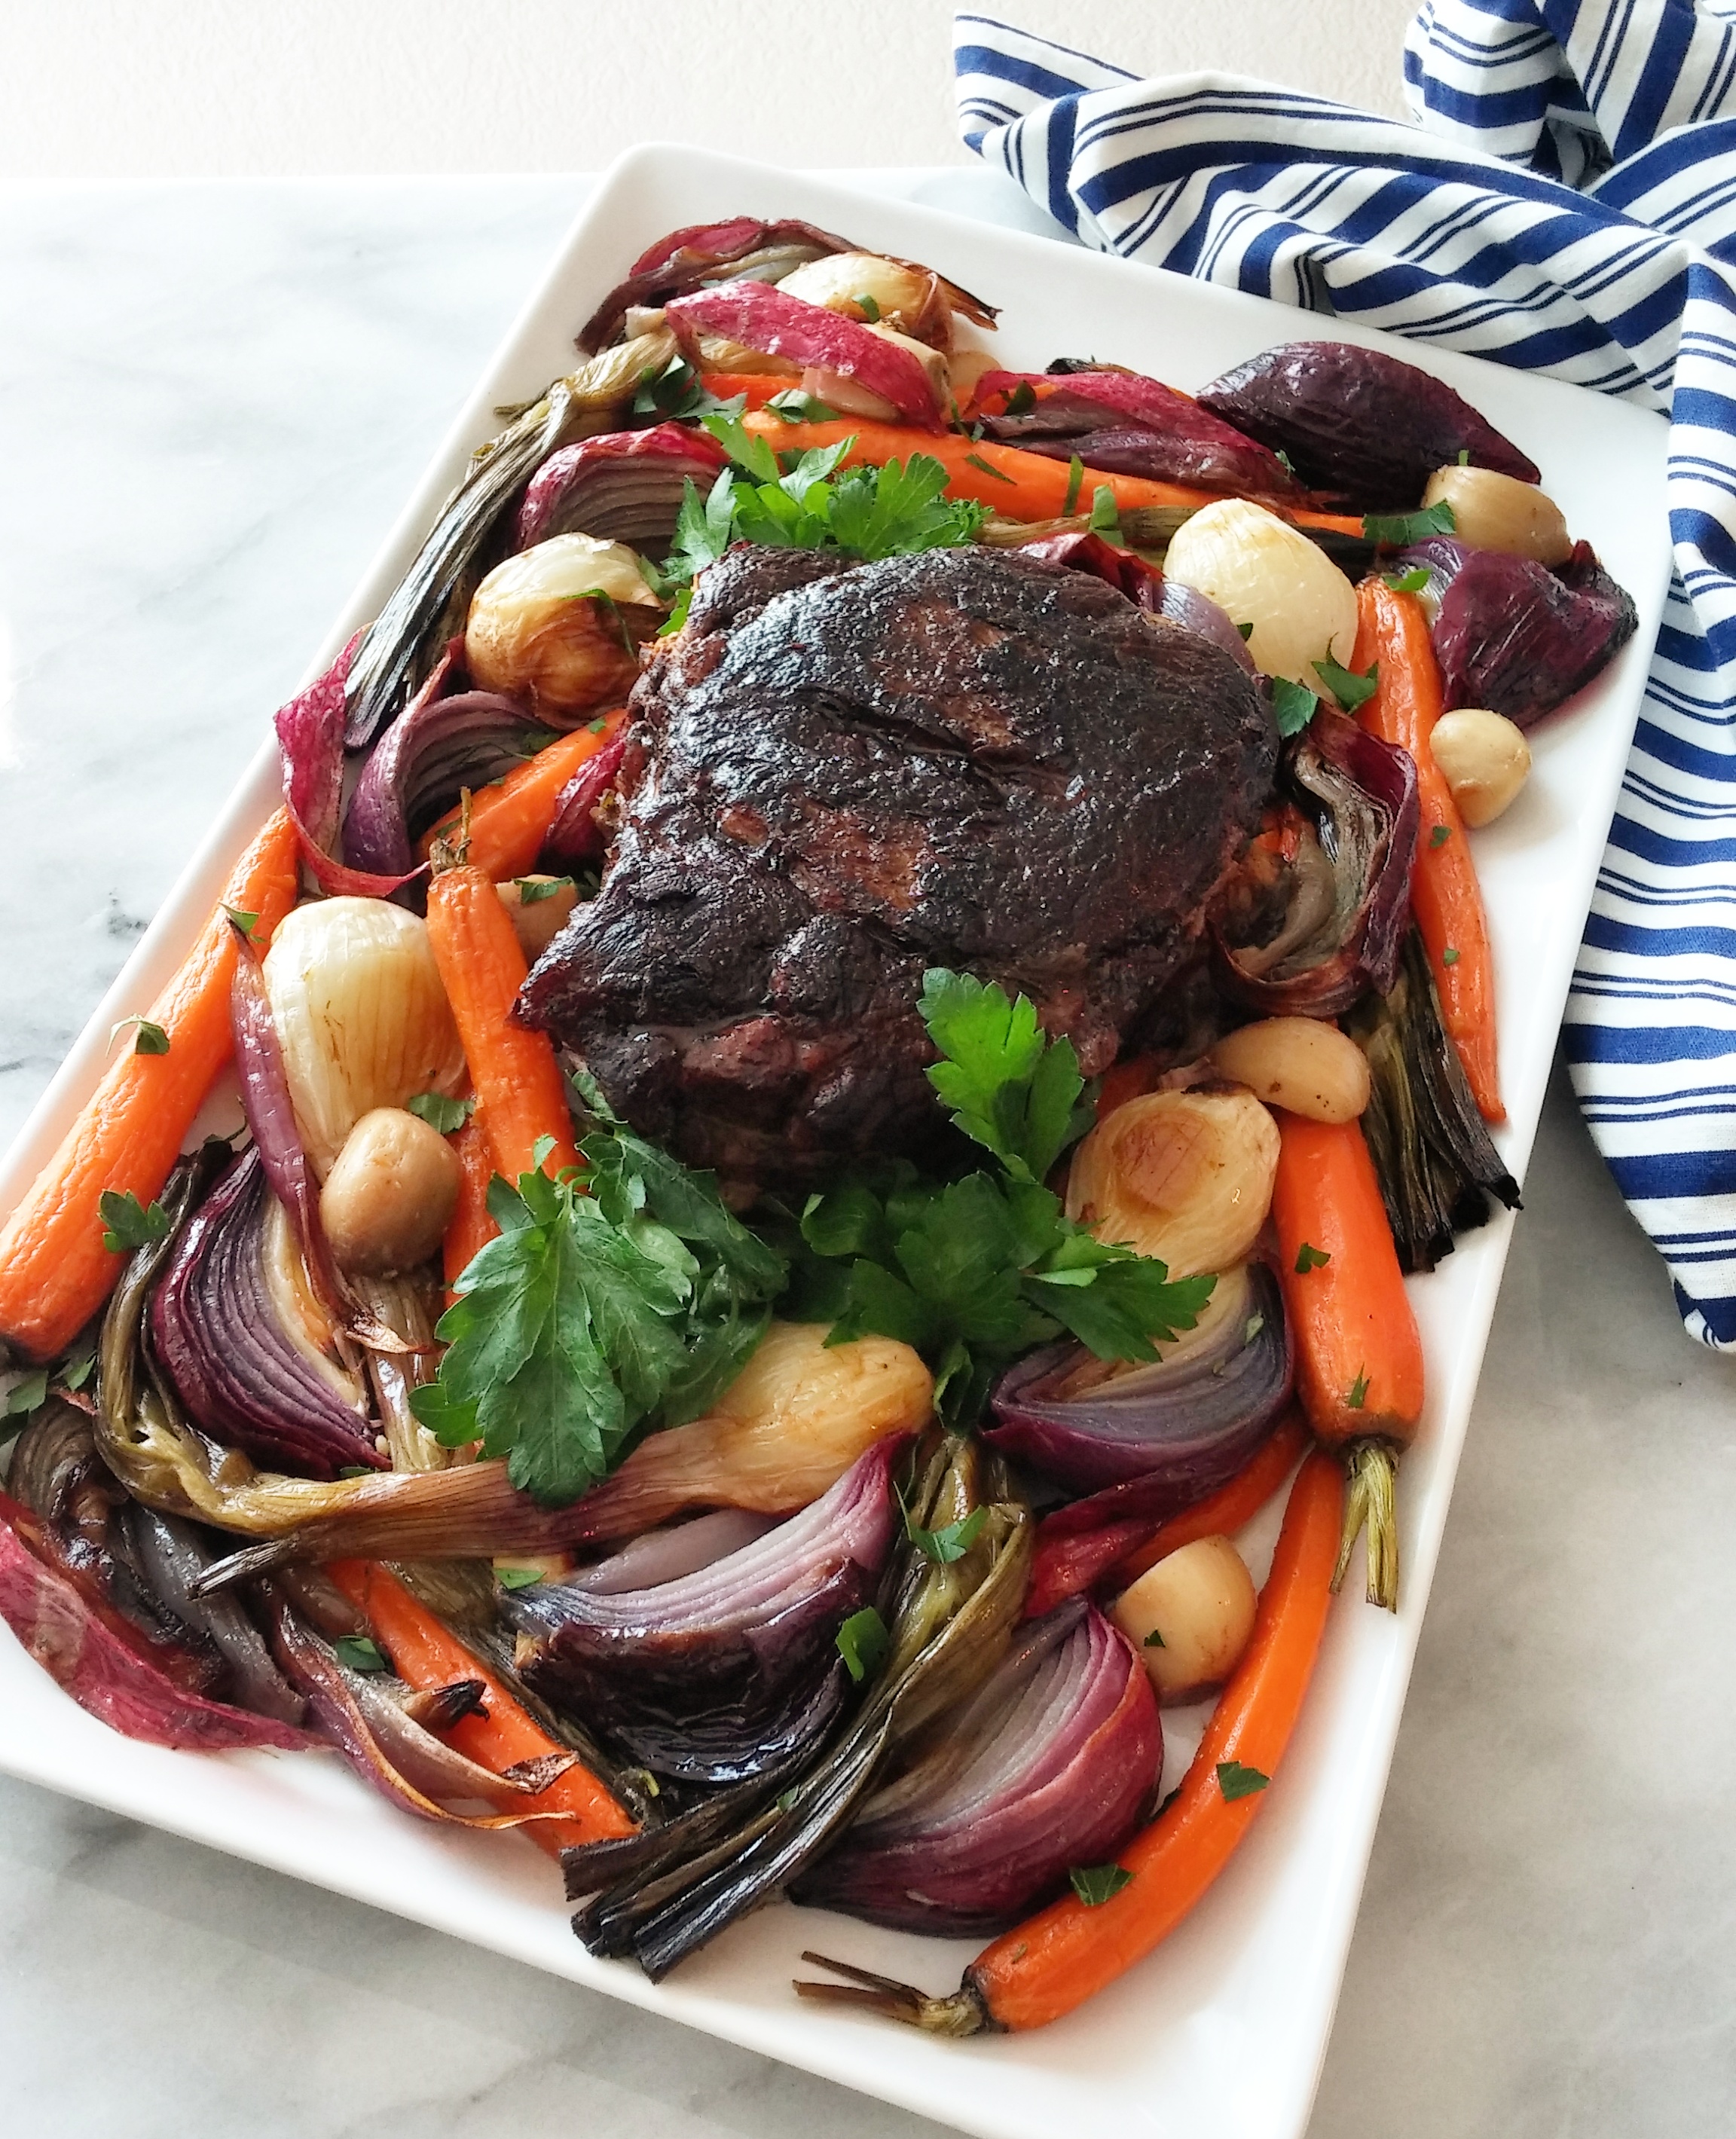
The roast with the most, featuring an appetizing deep brown caramelized color, tantalizing aroma and flavor. Pot roast is a relatively inexpensive tough cut that needs a long, moist cooking method to tenderize, or in cooking lingo – braising. As a guide, figure 1 hour per pound cook time, for example, a 4 lb roast will require about 4 hours. Years ago one could buy 5-6 lb roasts with no problem, but most are now cut in 3-4 lb sizes for reasons unknown to me. If you need a larger roast, buy two 3 lb pieces to cook in the same pan. The basic cook time, ingredient list and measurements stay the same and do not double. This recipe works well with chuck or shoulder, brisket, cross rib, and round (sometimes called rump) cuts.
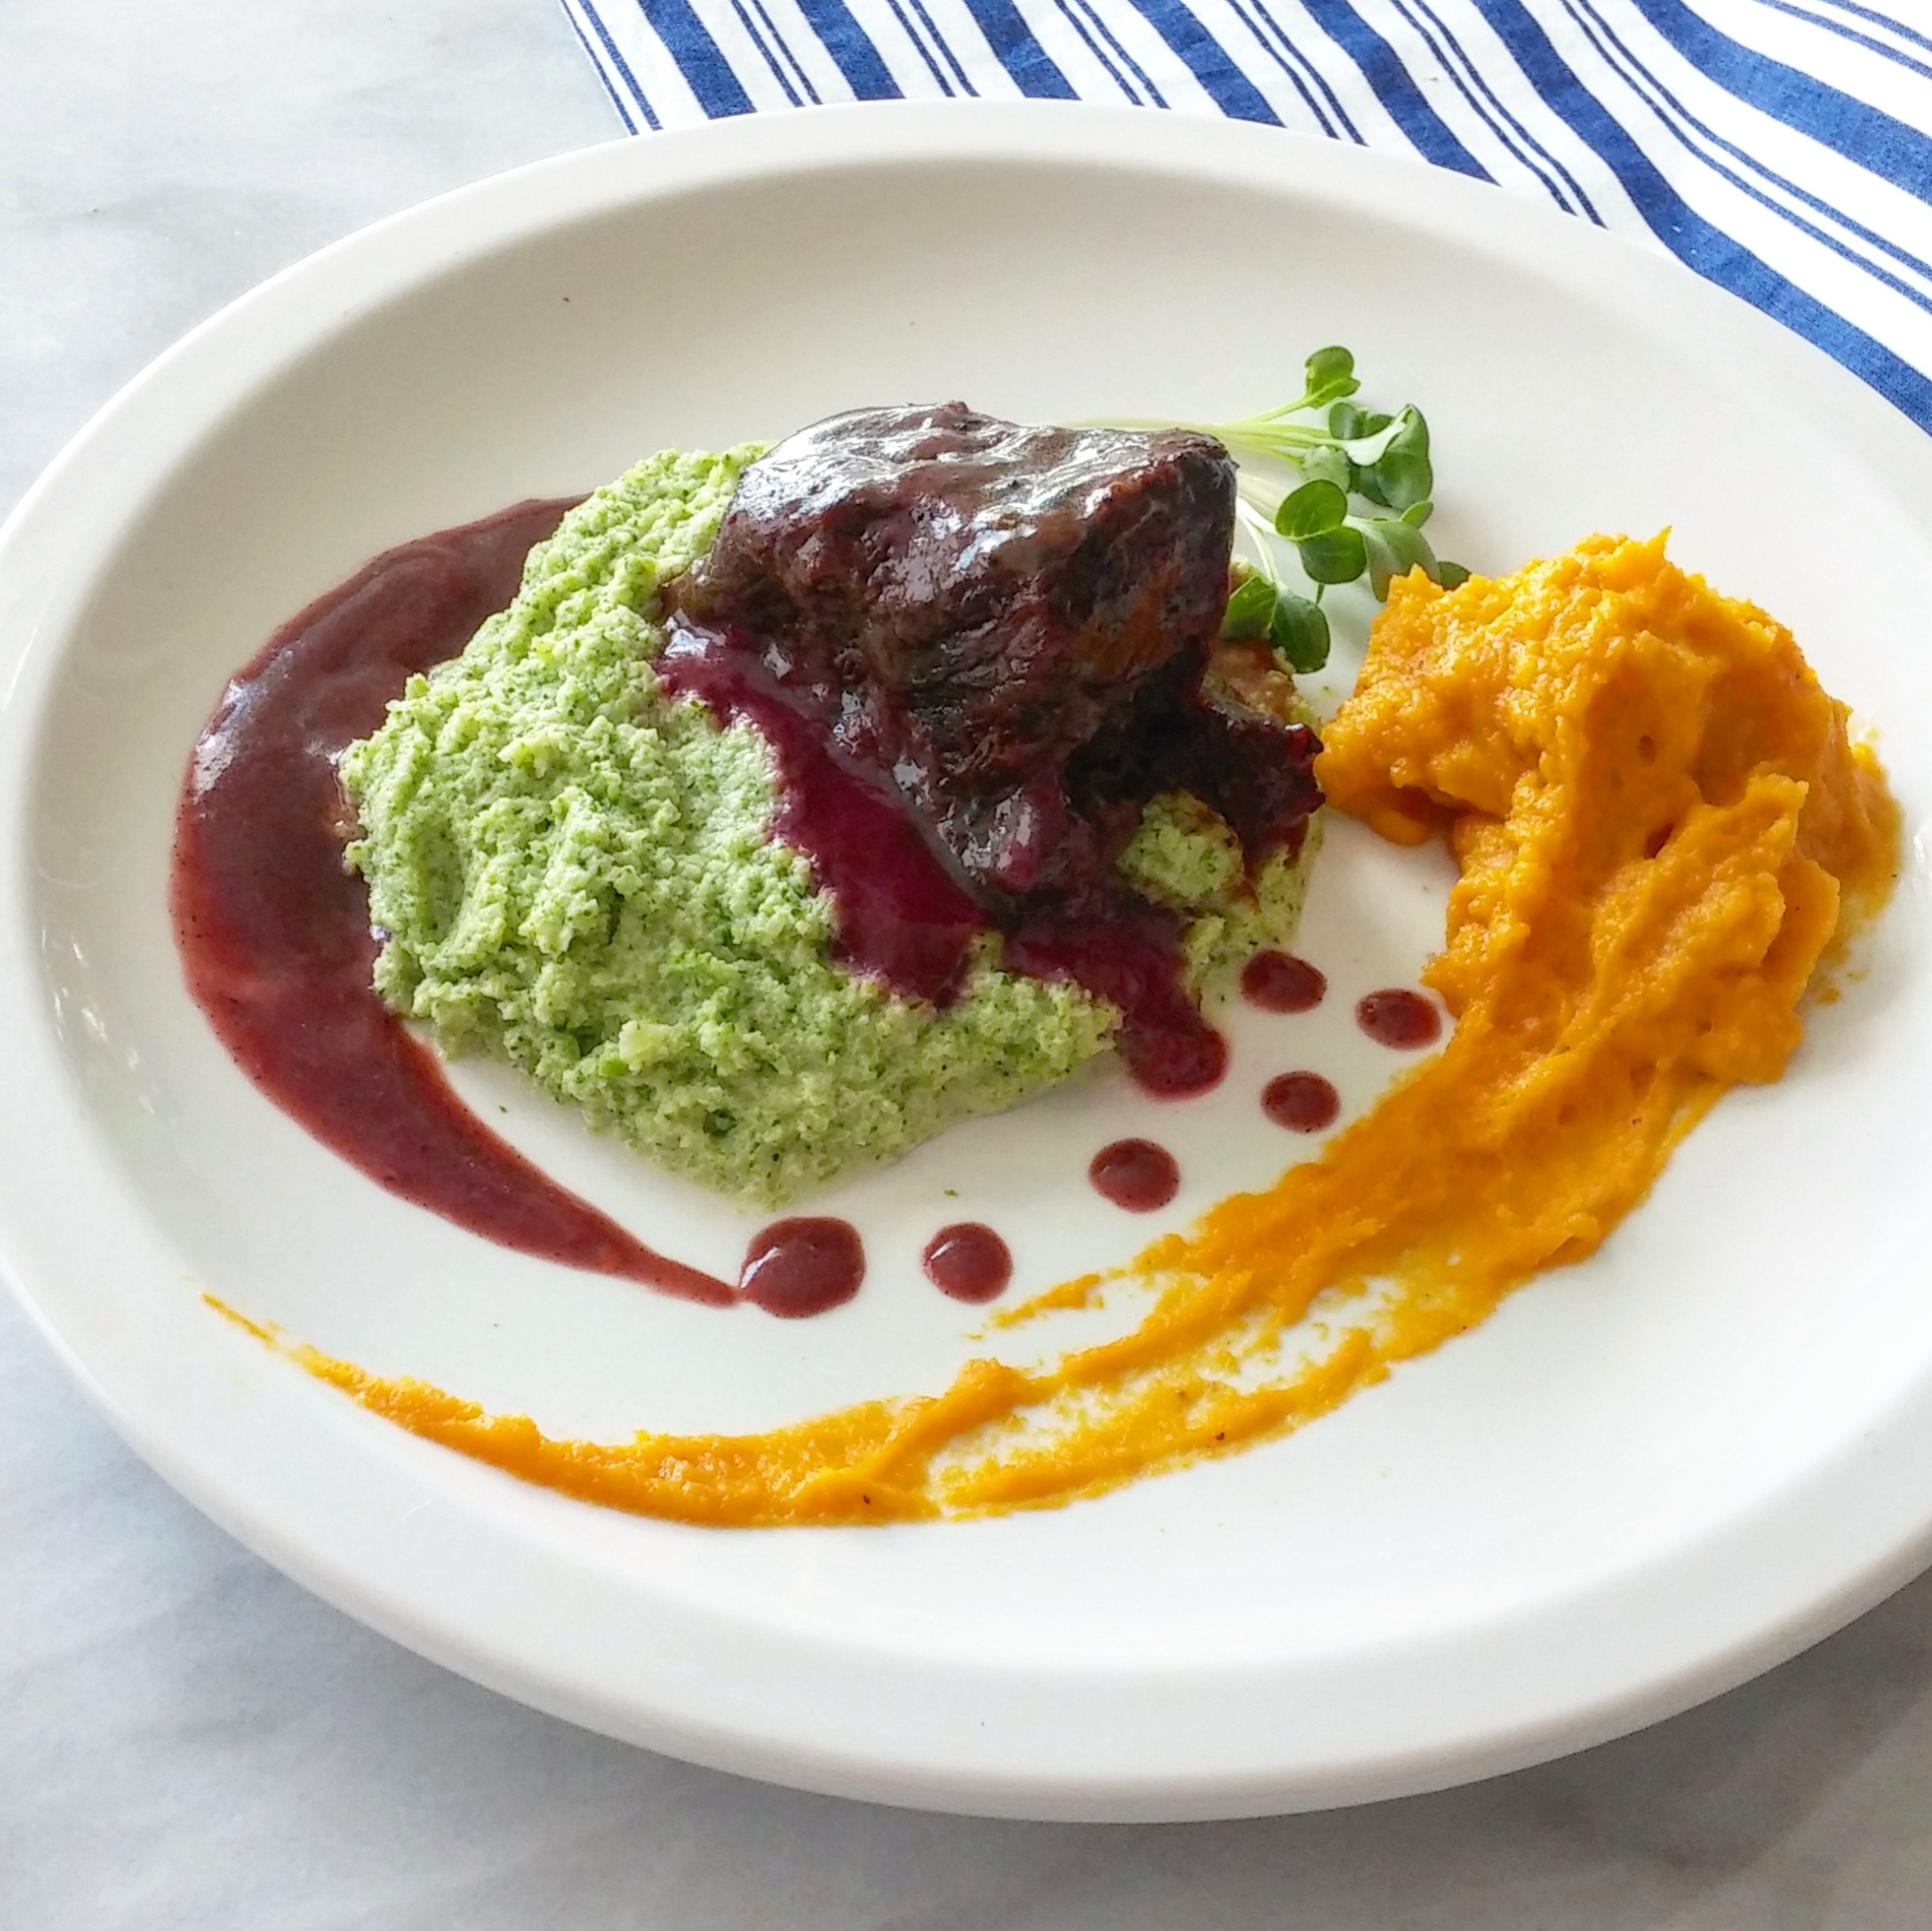
To avoid the dreaded overcooked vegetable syndrome, add them in the last 45 minutes of cook time. Even better, amaze and impress your family or friends with vegetables roasted separately and arranged artistically around the roast.
Ingredients:
4 tablespoons butter
1TBS olive oil
3-5 pounds roast meat removed from refrigerator 1 hour before cooking
2 medium yellow onions, sliced
3 celery stalks chopped into 1/2 inch pieces
1/3 cup balsamic vinegar or 1/2 cup red wine
6-10 peeled garlic cloves
4 large sprigs fresh thyme (if you can afford only one fresh herb, this is the one to choose)
4 springs rosemary (about 4 inches long)
4 large sprigs tarragon
3-5 cups water or beef broth
2-3 bunches carrots peeled and tops trimmed to a 1 in. green stub
4-6 red onions quartered
2 bunches baby onions trimmed with 3-4 inches of green tops left (optional)
1 cauliflower cut in large florets and/or celery root cut into 2 inch chunks (optional)
Olive oil if roasting vegetables
Salt and pepper to taste
Flat leaf parsley for garnish
Instructions:
Meat: Pat meat dry with paper towels. Heat 2 TBS butter in a large heavy bottomed dutch oven or heavy flameproof casserole pan over medium heat. Add roast to pan and brown well on all sides (about 3-5 minutes a side). Don’t hurry the process – take your time to get a rich caramel color. Watch your flame and don’t scorch the butter. Add more butter or oil if the pan starts to become dry. Remove roast from pan and set aside.
Preheat oven to 425 degrees
Add 2 TBS butter and the 2 sliced onions and three chopped celery stalks to drippings in pan and sauté on medium until fragrant and starting to caramelize, about 10 minutes. Add 1/4 cup broth or water and start to deglaze pan (this means you are dissolving all the brown bits in and stuck to the pan). Add 1/2 cup balsamic vinegar or wine to the onions. Continue to deglaze pan while bringing to a low simmer; stir until liquid has reduced (about 5 minutes).
Place roast back in pan with onions and celery. Add enough water or broth to cover roast about a third of the way up (about 1-3 cups beef broth, but this depends on your pan and the size of roast). Heat and bring to simmer. Add herb sprigs tied with string and 6-10 peeled whole garlic cloves. Place in oven and cook for 30 minutes uncovered at 425 degrees. Check liquid levels, turn oven down to 350 and continue to cook for an additional 30 minutes uncovered.
After you have a beautiful deep brown color to your roast, replenish liquid, salt and pepper, cover, and cook for another 2 hours for a 3 lb roast. For each pound of roast, add an hour. Before you stop cooking the roast, check to see if it is done – I check with a fork at the bottom to see if it pulls apart in the middle. Once roast is done, remove from oven and let rest for 15 minutes before carving.
Vegetables: In the last 45 minutes of cook time, add your choice of vegetables to juice in pan; cover and return vegetables and roast to oven. OR…
In the alternative, heat oven to 425 degrees after roast is done and removed. Generously coat prepared vegetables in olive oil and spread evenly across a large cookie sheet or shallow baking pan. Lightly salt and pepper. Roast for 20 minutes, turning midway. Arrange around roast and alternate colors to create a pleasing pattern.
Garnish with whole and minced flat leaf parsley.
Meat Broth: Remove any vegetables, the garlic cloves, and meat but retain the original sliced onions and celery in liquid – they should be pretty darn mushy at this point. Discard herb bundles. Strain pan juices to remove remaining woody herb stems and to press the original sliced onions and celery through (use a large spoon to do this). Scrap bottom of strainer with spoon to capture puree; add to strained liquid. Discard remaining pulp left in strainer. Since I cook only with 100% grass fed beef, I don’t skim the fat off anymore and leave it in to enhance flavor. Moisten meat and vegetables with strained juices prior to making gravy.
Gravy: While I prefer the strained juices ladled over my meat and vegetables, some may like a thickened gravy instead. Add 1 TBS Kuzu root or 2 TBS flour per cup of strained drippings. Bring to boil, turn down to simmer and whisk until thick. Salt and pepper to taste.
Cook’s Notes:
Check intermittently to make sure the broth level doesn’t dip dramatically.
Water used instead of broth is fine, especially if you can’t obtain a high quality organic, additive-free broth. High quality chicken broth will work as well. If you have any leftover liquid, freeze it to use with the next roast.
Cover after one hour of browning regardless of roast size. If you don’t have a lid for your pan, cover it with an aluminum foil tent. A cover and adequate liquid level is crucial to keeping your roast from from drying out.
Olive oil or ghee may replace butter.
Save the trimmed baby onion tops to slice and use in other dishes or salads.
Cross Rib roasts, while they slice better, tend to be a bit too lean for my taste, I prefer chuck if available. It is superior in flavor and moister, containing more gelatinous connective tissue. First cut brisket tends to be too lean as well in my opinion.
Variations:
Instead of baby spring onions, add small leeks to the vegetable line up. Cut in half lengthwise, wash, and trim. I particularly like baby onions though, because they add variety in shape.
Fennel quartered and roasted.
Broccoli cut into large florets and roasted.
Red pepper de-seeded, quartered and roasted.
Celery cut into 3 inch lengths roasted or added to juice.
Red baby round or fingerling potatoes roasted or added to juice (1-2 lbs) .
Cauliflower or broccoli puree/mash served with gravy instead of potato.
Lard meat with additional fat (beef tallow) to enhance flavor.
Orange zest put in with herbs.
Join my other health conscious subscribers and receive exclusive recipes, private Q&A’s, giveaways, blog post notices, and more! Sign up here. Thanks!